Are you looking to create a PowerPoint presentation on your WordPress site, but not sure where to start?
What if we told you that you can now use WordPress to design and share presentations and leave PowerPoint behind.
In this article, we will show you how to use your WordPress website to deliver PowerPoint type presentations.
Why Create Presentations in WordPress?
A presentation on your website helps create visual appeal, keeps viewers on your pages longer, and boosts search engine optimization.
There are several different ways to add presentation slides to a WordPress website.
- Use a plugin like Embed Any Document.
- Copy and paste an embed code from Google Slides.
- Use a third-party service like SlideShare.
The problem with these methods is that you have to create your presentation in other software like PowerPoint, Keynote, or Google Slides. After that, you can embed the original document to your WordPress posts and pages.
These embeds sometimes don’t work with all devices, look ugly, difficult to browse, and not very SEO friendly.
An easier alternative is to create your presentation in WordPress using HTML 5 and JavaScript. It is SEO friendly, works with any device, and looks great.
It is also easy to share, which brings direct traffic to your website instead of a third-party service.
That being said, let’s take a look at how to easily create a presentation in WordPress without using external software.
How to Create a Presentation in WordPress
First, you need to install and activate the Slides & Presentations plugin. If you need help, we have written a handy step-by-step guide on how to install WordPress plugins.
Upon activation, you need to visit Presentation » Add New page to create your first presentation.
If you are familiar with making PowerPoint presentations, then the process of creating one using the Slides and Presentations plugin will be simple.
Your presentation will be made up of slides. The plugin comes with a Slide block which you can use to add more slides to your presentation.
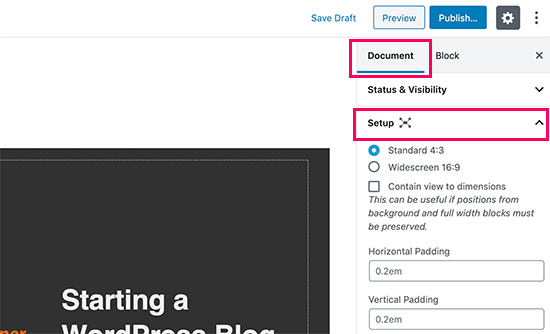
First, you need to click on the Setup tab under the Document settings. From here you can select your presentation size by choosing either the standard 4:3 or widescreen 16:9.
Below that, you will find the options to set background color/image, font, transition effects, and controls for your entire presentation.
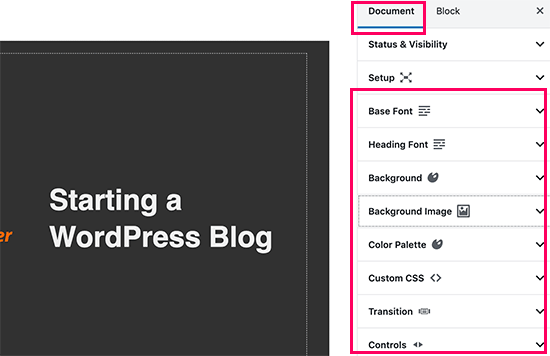
You can also change these settings for individual slides as you add them.
Now let’s start working on your slides.
In the content area, you will see a large box. This is where you will add your slide’s content.
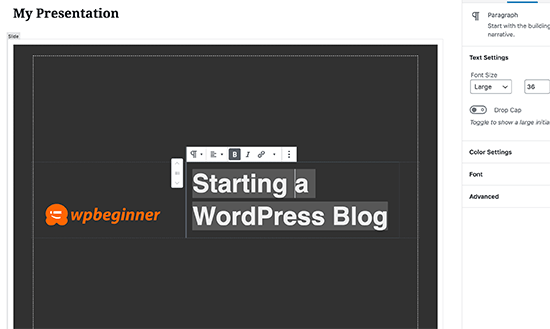
Yes, this is the same WordPress block editor that you use to write blog posts. You can add text, headings, lists, images, media, and embeds to your slide.
If you are new to the WordPress editor, then see our complete WordPress block editor tutorial to familiarize yourself with the blocks.
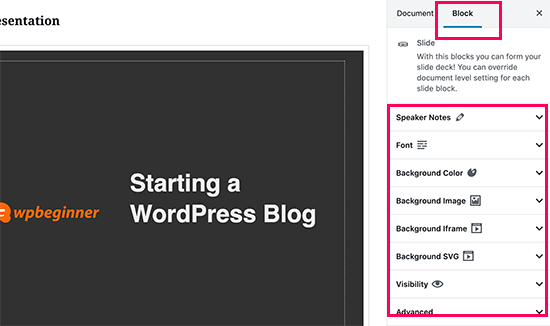
While editing a slide, you will see a number of editing and formatting options in the right column. From here, you can change the background, font, and other settings for a specific slide.
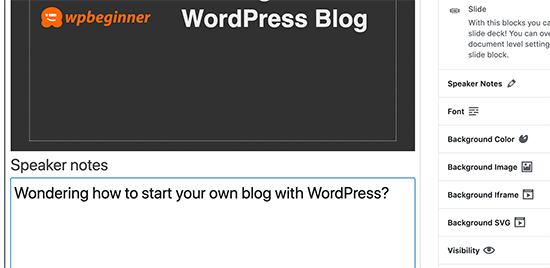
Below each Slide, you’ll also see a small box to add speaker notes. This is where you’ll add anything you want to remember when giving your presentation.
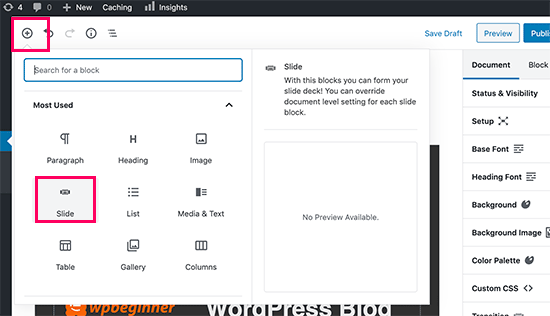
You can add a new slide by clicking on the + icon or adding a new Slide block from the top similar to adding any other block when creating content in WordPress.
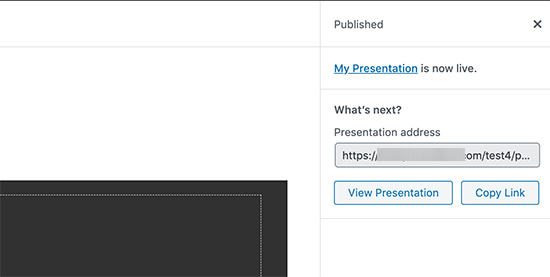
Once you are done working on your presentation, you can save and publish it. You can then copy the presentation link to share it or to view your presentation.
Presenting Your Slideshow
You can visit your presentation in a browser window. If you are logged in, then you’ll see the buttons to view your presentation in fullscreen and switch to the speaker view.
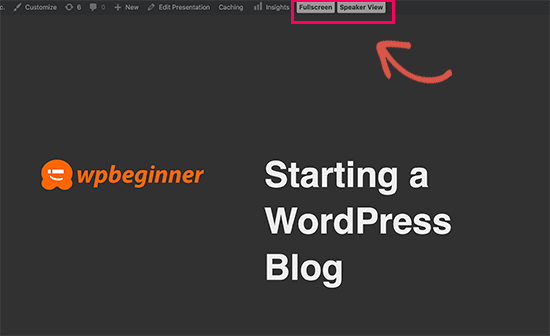
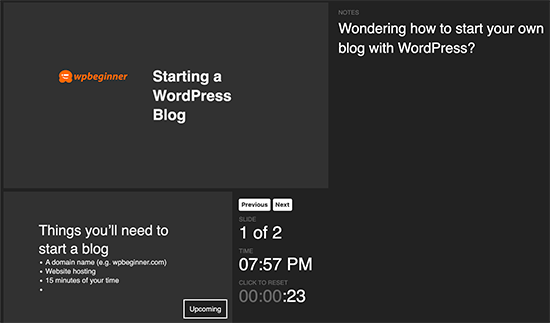
Switching to the speaker’s view will show speaker notes in a pop-up window showing speaker notes, the current slide, and the upcoming slide preview.
