Do you want to upload a HTML page to your WordPress site? Sometimes you may need to add a static HTML page and make it accessible along with your WordPress site. In this article, we will show you how to properly upload a HTML page to your WordPress site without causing 404 errors.
Why Upload HTML Pages to WordPress?
WordPress comes with a built-in content type to add pages to your website. Often WordPress themes add pre-designed page templates to display your pages.
There are even WordPress landing page plugins that allow you to create beautiful page templates with a drag and drop builder.
This means that in most cases, you shouldn’t need to upload a HTML page to your WordPress site.
However, sometimes a user may have static HTML pages from their old website or a static template that they really like and want to use. In these scenarios, you will need to upload your HTML page to WordPress.
Since, WordPress comes with its own SEO friendly URL structure, it can cause a 404 error if you simply uploaded your HTML page and tried to access it.
That being said, let’s take a look at how to upload a HTML page to your WordPress site without causing 404 errors.
Uploading HTML Page to WordPress Site
Before you upload your HTML page to the WordPress site, you need to make sure that the ‘index.html’ file is renamed to ‘index.php’.

After that, you need to add all files including the HTML page, CSS, and other folders to a Zip archive.
Windows users can right-click and select Send to » Compressed Zip Folder option to create a zip file. Next, simply drag and drop all files and folders for your HTML page to the zip file.

Mac users can select the parent folder containing all files and folders, and then right-click to select ‘Compress folder’ option.
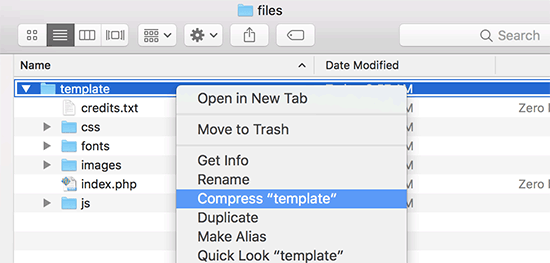
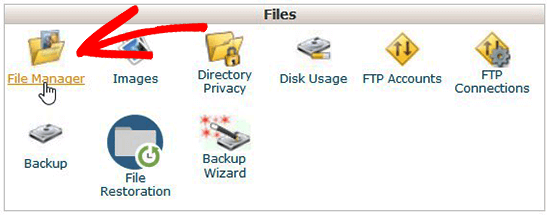
Next, you need to go to the cPanel of your WordPress hosting account. In the cPanel, you need to scroll down to the Files section and then click on the File Manager app.
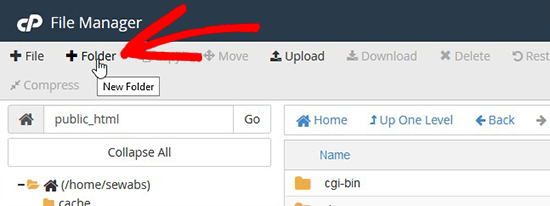
Once you are in File Manager, you need to navigate to the website root folder which is usually called public_html and contains all your WordPress files folders. From there, you need to click on the Folder link from the top menu to create a new empty folder.
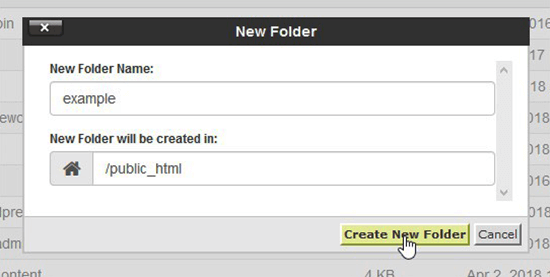
A popup will open where you need to add a name for the new folder. Use a name that you want to use as the URL of your HTML page and then click on the Create New Folder button.
After creating the folder successfully, you need to open it and click on the Upload button from the top menu to select and upload the zip file you created earlier from your computer. You’ll see the progress bar while the zip file uploads to your site.
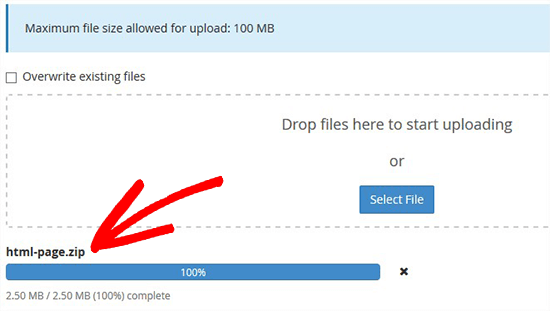
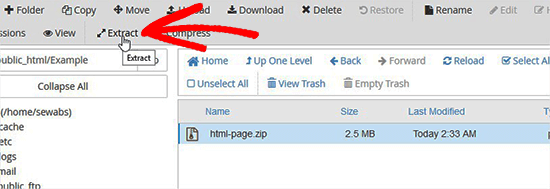
Once uploaded, you need to select the zip file and then click on Extract button from the top menu.
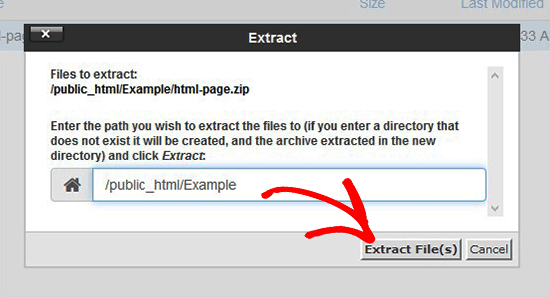
You will be asked where to extract the files. Simply select the same new folder that you created and click on the Extract File(s) button.
File Manager will now extract the zip file, and you will be able to see files in your folder.
Note: You can now delete the zip file from here. It doesn’t affect your HTML page or any other folders that are extracted.
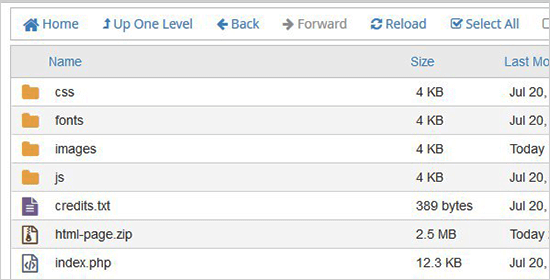
Now you can visit this page in the browser by using the name of the folder (For example, yourwebsite.com/example). If your server doesn’t support the redirection, then you may see a 404 error. It happens because your ‘index.php’ file is not redirected on loading the URL in browser.
It is one of the common WordPress errors and can be fixed easily.
Using the File Manager app, you need to edit .htaccess file in your website’s root folder and add the following code:
RewriteRule ^(.*)index.(php|html?)$ /$1 [R=301,NC,L]
This code will redirect your ‘index.php’ file and load it in the browser. If you are using a case-sensitive name for a file or folder, then the above code will also redirect that to show you the content.


