Do you want to automatically log out idle users in WordPress? As a security-conscious site admin, you may want to force inactive users to login again.
Banking websites and apps already use this technique to avoid unauthorized users from accessing accounts or hijacking them. You can also implement this functionality on your own WordPress website to improve security.
In this article, we will show you how to automatically log out inactive users in WordPress. Once logged out, users will be asked to log in again to resume what they were doing.
The first thing you need to do is install and activate the Inactive Logout plugin. For more details, see our step by step guide on how to install a WordPress plugin.
Upon activation, simply go to Settings » Inactive Logout page to configure the plugin settings.
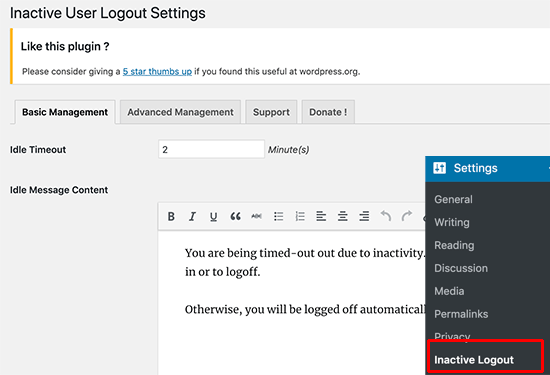
First, you need to enter the time after which a user will be automatically logged out. You can enter the time in minutes and make sure it is not too short or too long.
After that, you can enter a message that you want to be displayed to inactive users.
Below the message field, you will find more plugin options to change logout functionality. The default settings would work for most websites, but you can change them if you want.
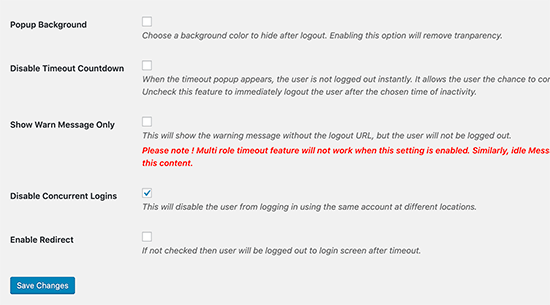
Popup Background – You can enable this option if you want to change the background color of screen when a user session times out. This option will cover the user’s browser screen and will keep the contents hidden from prying eyes.
Disable Timeout Countdown – This option will remove the countdown warning and will directly logout idle users.
Show Warn Message Only – If you don’t want to use auto logout feature, then check this option. It will only display the warning message and will cover the screen if you have popup background option checked.
Disable Concurrent Logins – This option will restrict your WordPress users from concurrent logins. This means they will not be able to use the same account to log in at the same time from different devices.
Enable Redirect – By default, the plugin displays a log in popup and does not redirect users. You can enable this option to redirect users to any other page you want.
After you have reviewed and changed settings, don’t forget to click on the ‘Save settings’ button to store your changes.
Setting up different timeout settings based on user roles
If you want to set timeout rules based on user roles and capabilities, then you can do so under the ‘Advanced Management’ tab on the plugin’s settings page.
First, you need to select the user roles that you want to set up differently than global settings. After that, you will be able to select timeout in minutes, redirects, or even disable timeout settings for that user role.
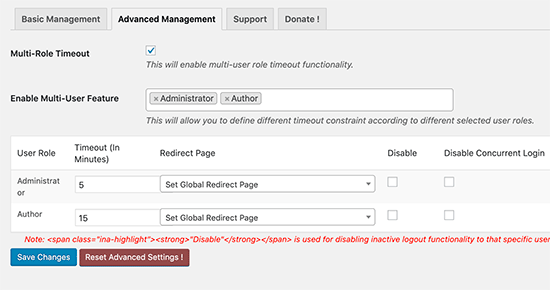
Once you are satisfied with the settings, click on the ‘Save settings’ button to save your changes.
To see the plugin in action, you can login to your website and do nothing for the time duration that you have set in plugin settings. After that, you will see a countdown timer popup appear.
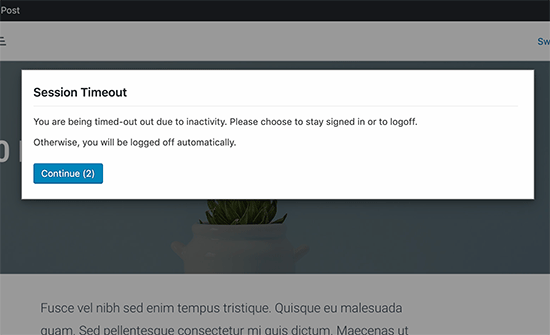
You can click on the continue button to resume working without expiring the session.
Users who don’t click on the continue button will be logged out and they will see the login screen.
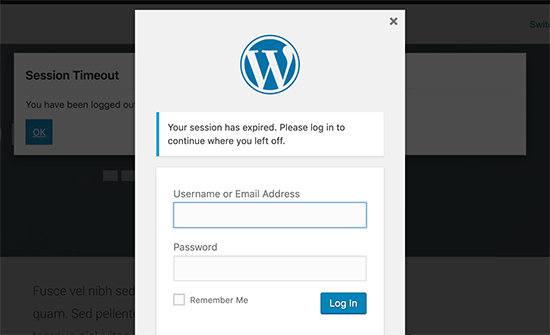
Add More Security with Two Step Authentication
Now one problem with this approach is that many users save their passwords using a password manager or their browser’s built-in password storage feature.
This means that their login popup will already have their username and password fields filled in. Any person can just click on the login button to access their account while they are away.
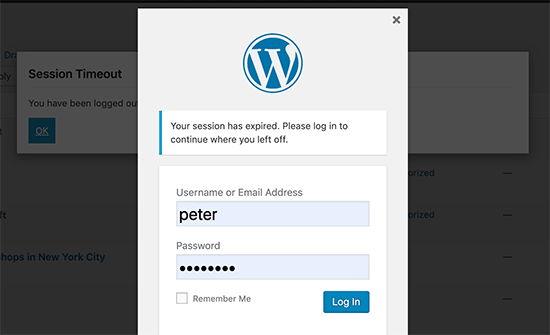
You can make unauthorized access more difficult by adding two-step verification to the WordPress login screen.
It basically requires users to enter a unique one-time password generated by an app on their phone. For detailed instructions, see our guide on how to add two-factor authentication in WordPress.


