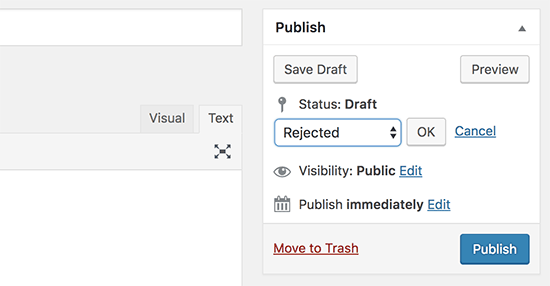
Do you want to add a custom post status for your blog posts in WordPress? Post status is an editorial tool that allows you to organize your articles based on their respective stages during the editorial workflow. In this article, we will show you how to easily add custom post status to blog posts in WordPress.
What is Post Status in WordPress and Why Do You Need it?
Post status is an editorial tool that tells WordPress the stage of a blog post during editing. For example, posts that are incomplete are saved with the post status labeled ‘Draft’. When you publish an article, the status changes to ‘Published’.
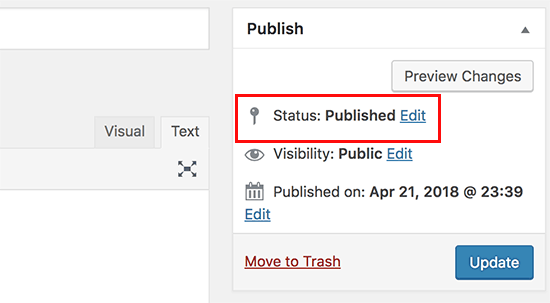
Post status helps WordPress choose how to handle and display blog posts on your website. For example, it will automatically exclude posts labeled draft from your homepage and other publicly viewable areas of your website.
By default, WordPress comes with the following post status that you can use:
- Draft – An item that is saved but incomplete and not yet published
- Auto draft – WordPress has an auto-save feature that automatically saves a draft as revision.
- Pending review – Items that are complete and submitted for review but not yet published.
- Future – Posts scheduled to be published later.
- Private – Items marked as private
- Trash – Items that are trashed
- Inherit – Child pages that automatically inherit status of their parent page.
Apart from these default post statuses, you can also create your own custom post statuses to improve your editorial workflow. For example, you can add a label ‘Not suitable’ for posts that are complete but not suitable for publication.
Having said that, let’s take a look at how to easily create custom post statuses in WordPress.
Method 1. Create Custom Post Status Using a Plugin
This method is easier and recommended for most users. It allows you to create custom post statuses as well as efficiently manage editorial workflow on your multi-author WordPress blog.
The first thing you need to do is install and activate the Edit Flow plugin. For more details, see our step by step guide on how to install a WordPress plugin.
Upon activation, the plugin will add a new menu item labeled ‘Edit Flow’ to your WordPress admin menu. Clicking on it will take you to the plugin’s settings page.
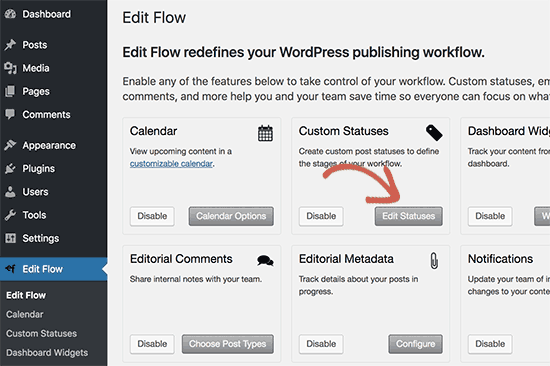
Edit Flow comes with a lot of useful features, and you can turn them On/Off from this screen. Go ahead and click on the ‘Edit Statuses’ button under ‘Custom Statuses’ box to continue.
Edit Flow automatically creates the following custom post statuses:
- Pitch – Used to pitch new article ideas and this status also becomes the default post status of every new post.
- Assigned – You can select an author and mark an article as assigned so that the author can work on it.
- In progress – Writer is working on the post but is not yet available as a readable draft.
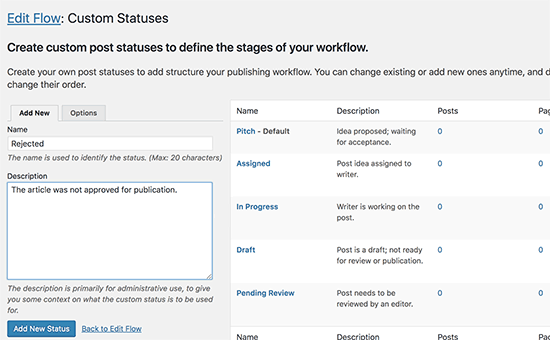
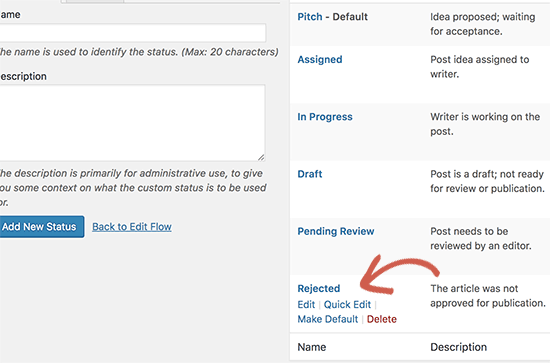
You can create your own custom status by providing a name and description in the left column. Once you are done, click on the ‘Add new status’ button to save your changes.
Your custom status will now appear in the right-hand column, so you can edit or delete it at any time.
Next, you need to go to Posts » Add New page to create a new post. On the post edit screen, click on the ‘Edit’ link next to status option under the ‘Publish’ meta box.
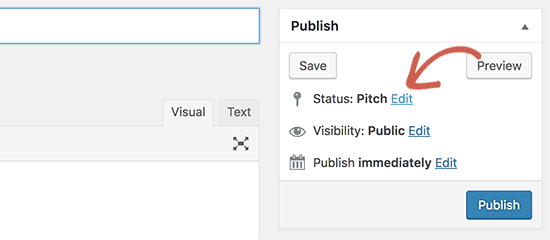
This will reveal a drop-down menu showing all post statuses that you can select including the custom post status you just created.
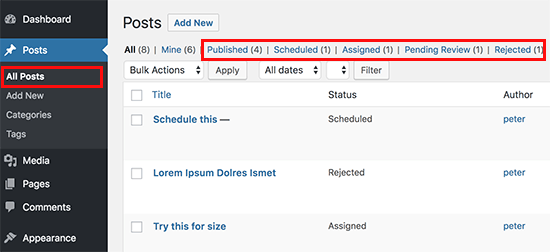
You can also see all articles filed under different post statuses by visiting Posts » All Posts page.
Method 2. Create Custom Post Status Using Code
WordPress has a known bug in the API used to register custom post statuses. It allows you to create custom post status, but you cannot use it in the admin panel. This means that the coding method can get the job done, but it is not as clean, and you will need to change it after it is officially fixed.
However if you still want to do it manually, then you can continue reading.
This method requires you to add code to your WordPress site. If you haven’t done this before, then take a look at our guide on how to copy and paste code in WordPress.
First, you need to add the following code to your theme’s functions.php file or a site-specific plugin.
// Registering custom post status
function wpb_custom_post_status(){
	register_post_status('rejected', array(
		'label'                     => _x( 'Rejected', 'post' ),
		'public'                    => false,
		'exclude_from_search'       => false,
		'show_in_admin_all_list'    => true,
		'show_in_admin_status_list' => true,
		'label_count'               => _n_noop( 'Rejected <span class="count">(%s)</span>', 'Rejected <span class="count">(%s)</span>' ),
	) );
}
add_action( 'init', 'wpb_custom_post_status' );

// Using jQuery to add it to post status dropdown
add_action('admin_footer-post.php', 'wpb_append_post_status_list');
function wpb_append_post_status_list(){
global $post;
$complete = '';
$label = '';
if($post->post_type == 'post'){
if($post->post_status == 'rejected'){
$complete = ' selected="selected"';
$label = '<span id="post-status-display"> Rejected</span>';
}
echo '
<script>
jQuery(document).ready(function($){
$("select#post_status").append("<option value="rejected" '.$complete.'>Rejected</option>");
$(".misc-pub-section label").append("'.$label.'");
});
</script>
';
}
}
Don’t forget to replace all instances of the word rejected with your own custom post status.
This code registers a custom post status and after that, it uses jQuery to add it to the admin panel. You can now edit a WordPress post, and you will be able to see it in the status drop-down menu.
