Recently one of our readers asked us to cover how to install WordPress on Amazon Web Services (AWS). Often reserved for larger projects, Amazon Web Services is a powerful cloud computing platform that allows anyone to harness the power of Amazon’s superior infrastructure on a pay as you go basis. In this article, we will show you how to install WordPress on Amazon Web Services.
Note: If you are just starting a website, then we recommend using one of the easier solutions from our how to install WordPress guide.
We have split this article in two methods. The first method is a manual process that is very technical and complicated. The second method is an easier solution for beginners because it allows you to use AWS infrastructure by going through a preferred managed WordPress hosting solution.
Method 1. Creating a Custom WordPress Install on AWS
First thing you need to do is visit the Amazon Web Services website. You can create a free account, but you will need to enter credit card information. Amazon will verify your identity by sending a $1 charge to your card.
Once your account is verified, you need to login to your AWS console and click on the ‘Services’ menu. Under the compute section, you need to select EC2 to continue.
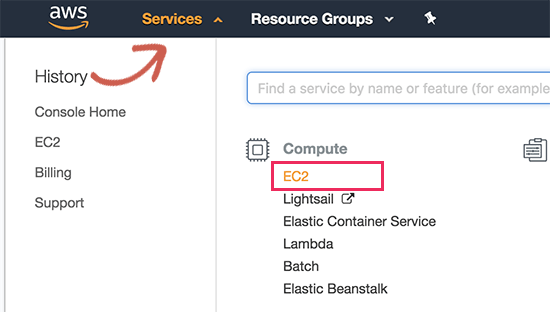
EC2 is AWS’s cloud computing platform that allows you to create virtual machines and run web apps like WordPress. For more details on what’s a virtual machine, read our guide on what is a VPS and do you need it.
Next, click on the ‘Launch Instance’ button to launch and configure your instance settings.
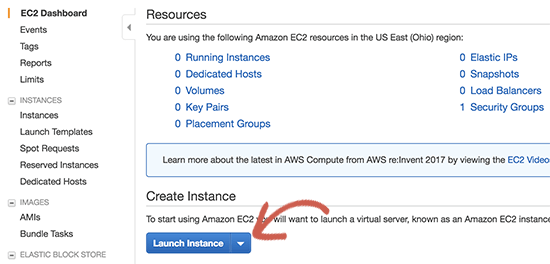
You will need to select an Amazon Machine Image. These are pre-configured software stacks that you can install with a single click.
Under the ‘AWS Marketplace’ search for WordPress and then select ‘WordPress by Bitnami’.
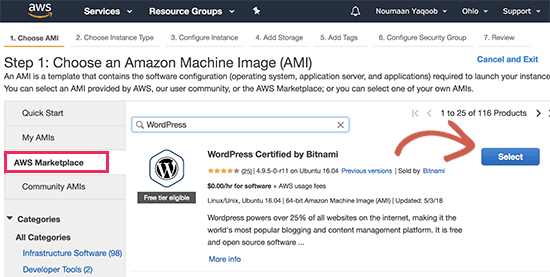
You will now see a pricing popup where you simply need to click on the continue button.
On the next screen, you will be asked to choose an instance type. You can go ahead and select td.micro free tier and then click on ‘Configure instance details’ button.
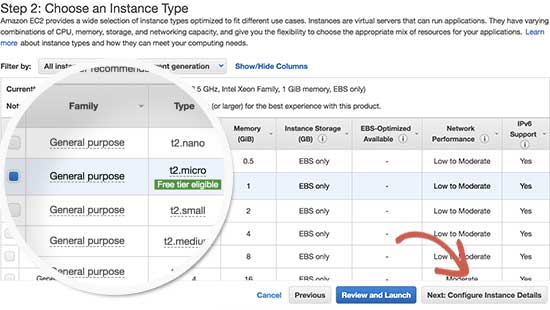
On the next screen, you don’t need to change anything. Simply click on ‘Next: Add Storage’ and then click ‘Next: Add Tags’ buttons.
Now we will enter a name for this instance as a tag. Click on the Add Tag button and enter ‘Name’ as key, and ‘MyWordPress’ as value.
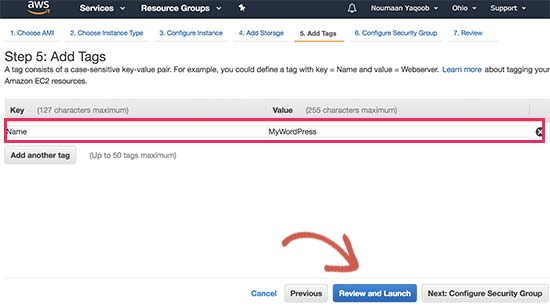
Click on the ‘Review and launch’ button to continue.
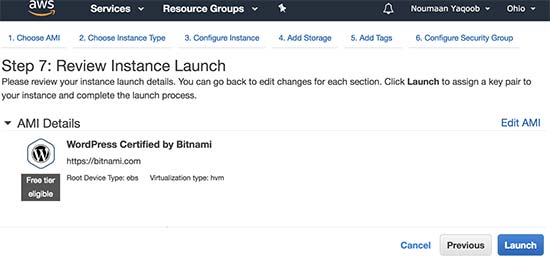
You will now be presented with an overview of your EC2 Instance configuration. Click on the ‘Launch’ button to start your instance.
Next, you will be asked to select pair keys. You need to select ‘Proceed without a key pair’ and then check the box below it.
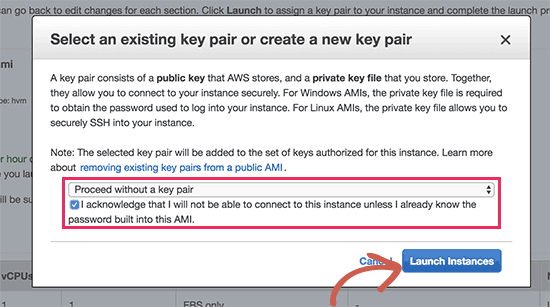
After that click on the launch instances button to store your settings and launch your EC2 instance.
AWS will now show a success message. Click on the ‘View Instances’ button at the bottom right corner of the screen.
You will now be able to see your WordPress instance running.
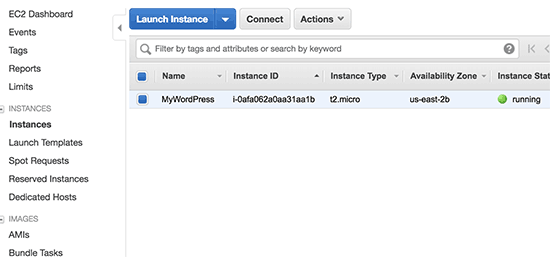
To test your WordPress site, you need to locate its public IP address. You can find it under IPV4 Public IP column next to your instance.
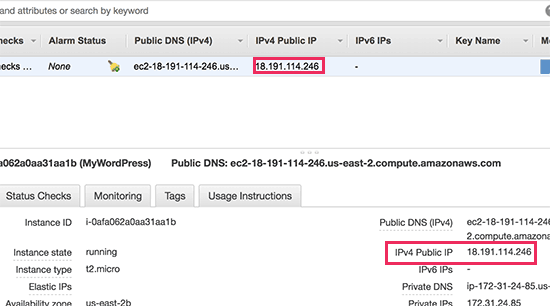
You can now copy this IP address and enter it in the address bar of a new browser tab to view your website. You will be able to see your WordPress site with the default theme.

To visit your WordPress admin area, simply add /wp-admin/ next to your site’s public IP address, like this:
https://18.191.114.246/wp-admin
You will now see the default WordPress login page.
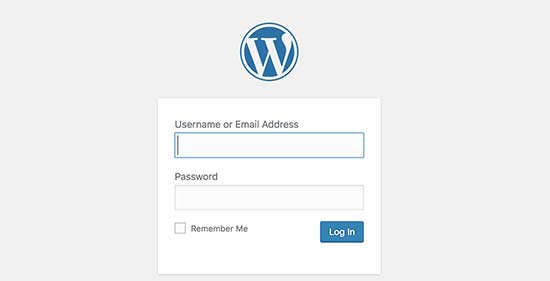
However, you will need to know the username and password to access the admin area.
You can get that by going back to your EC2 Console and clicking on the ‘Actions’ button and then select Instance Settings » Get System Log.
This will bring up a log file in a popup window with lots of text. You will need to scroll down towards the bottom, and you will find a line with ‘Setting Bitnami user password to’ surrounded by ## signs. You will also see the default username set by the app.
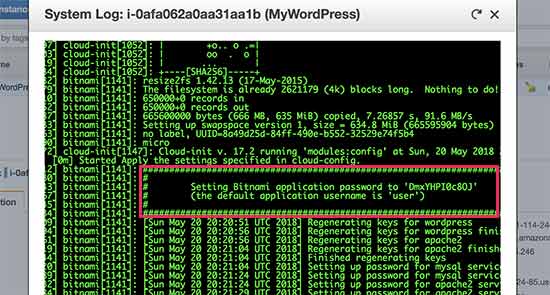
You can now copy the username / password and enter it on the login screen of your WordPress site.
Congratulations, you have successfully installed WordPress on Amazon Web Services. However, your website is still only accessible by using the IP address.
If you want to point a domain name to your AWS WordPress install, then you will need to connect your domain name to AWS’s DNS servers.
See our step by step guide on how to register a domain name.
Once you have registered your domain name, you’re ready to add it to your AWS instance.
Add a Domain Name to Your WordPress Site on Amazon Web Services
First, go to your EC2 instances dashboard and then from the left column click on ‘Elastic IPS’ under ‘Network & Security’ section.
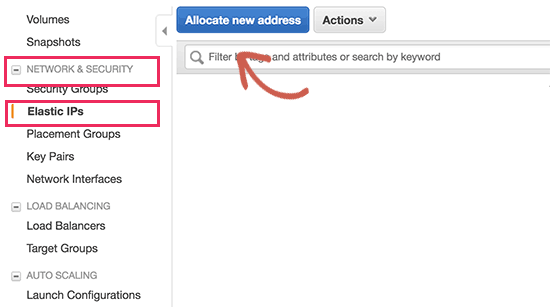
Next, click on the ‘Allocate New Address’ button to continue.
You will be asked how do you want to use the IP address. Simply click on the Allocate button to continue.
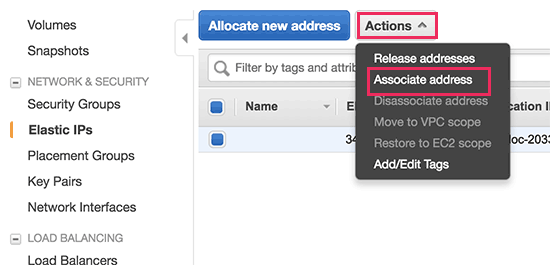
AWS will now create a new elastic IP for your WordPress EC2 instance. You will see your IP address listed in a table. Simply select the IP address row and then select ‘Associate Address’ under the ‘Actions’ button.
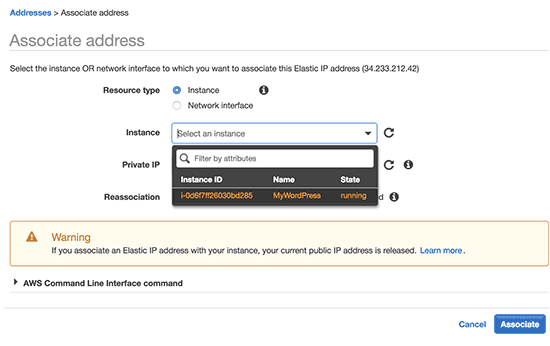
On the next screen, select your WordPress instance from the drop-down menu and click on the Associate button.
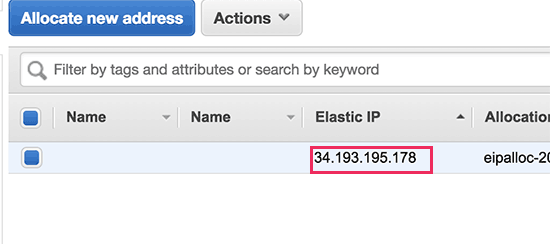
You will now see your Elastic IP listed in the table. Go ahead and copy the IP address and paste it into a text editor like Notepad. We will need it in the next step.
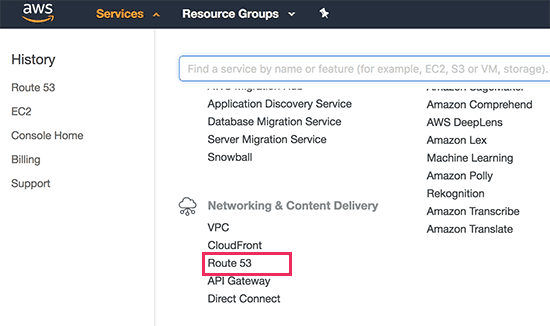
Next, you need to click on the ‘Services’ menu at the top and search for ‘Route53′. This is Amazon web services’ DNS management service that allows you to route traffic to your EC2 instance.
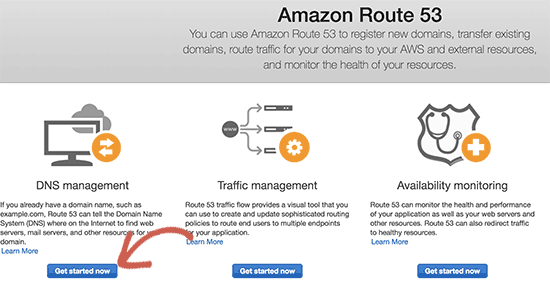
On the next page, click on the ‘Get Started Now’ button under the DNS management section.
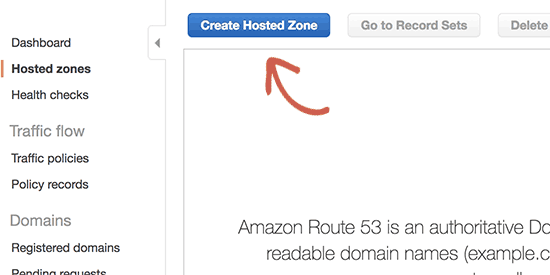
This will bring you to hosted zones section. Go ahead and click on the ‘Create hosted zone’ button.
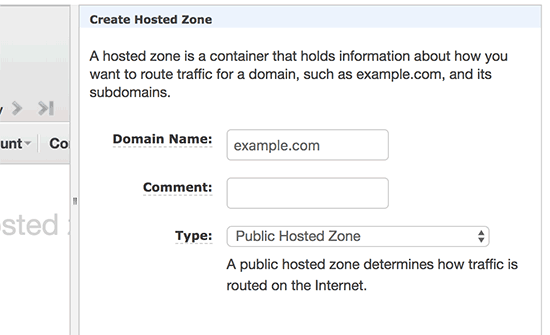
Next, you need to add your domain name and click on the create button to add it to a hosted zone.
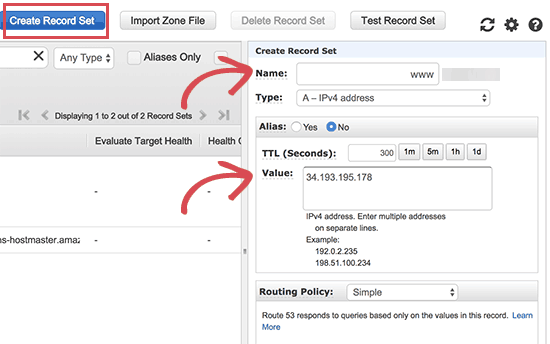
After you have added your domain to a hosted zone, click on the ‘Create Record Set’ button. Now you need to enter www next to ‘Name’ field. Enter the elastic IP you copied earlier in the ‘Value’ field and then click on create button.
The A record will now be added to your hosted zone along with your domain name. From the left column, you need to copy the lines under NS field. These are Nameserver addresses that you will need in the next step.
Now you need to go to your domain name registrar website and edit your domain name settings. The screenshots below may vary from your provider, but the basic instructions are similar for each provider.
Under your domain’s DNS Nameservers settings, enter the nameserver addresses you copied earlier.
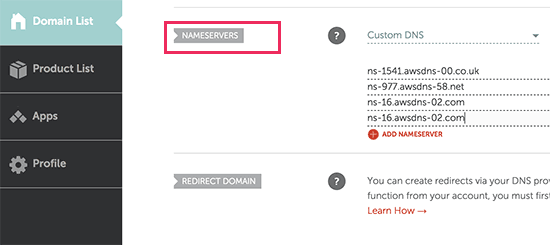
Don’t forget to save your changes. You can now visit the domain name you added and it will take you to your WordPress site on Amazon Web Services.
Note: DNS changes may take some time to take effect.
Method 2. Using Amazon Web Services via Managed WordPress Hosting
As you may have noticed that setting up a custom WordPress install on Amazon web services is a very technical and complicated process.
The cloud computing infrastructure provided by Amazon Web Services is a pay as you go solution. This means that traffic spikes will increase your hosting bill significantly. Not to mention, that you will still be responsible for managing your own services which is just extra work.
An easier way to use WordPress on Amazon Web Services without any hassle is by using a managed WordPress hosting provider.
We recommend using WP Engine. They run part of their hosting platform on the AWS infrastructure, and you don’t have to worry about traffic spikes, server management, or WordPress maintenance.
Another great alternative is Pagely, a premium managed WordPress hosting provider. They also run their platform on Amazon Web Services and offer a hassle-free, WordPress environment to grow your business.


