Do you want to block a WordPress user from your blog? The simplest way to achieve this is to delete their user profile, but it will remove them completely from your site. In this article, we will show you how to block a WordPress user without deleting their account.
Why You Shouldn’t Delete a User Account?
The easiest way to block a WordPress user is by simply deleting their user account. However, deleting a user account in WordPress requires you to assign all their content to another user. This will change the author information for those articles.
One way to deal with this issue is to change the user’s password and email address by editing their user profile. This will block their access, and they will not be able to login. However, this will also change their Gravatar image.
Wouldn’t it be nice if you could block a user without actually deleting their user account? This way, no content will be moved, and you wouldn’t have to delete any user profile information.
The blocking feature can be really helpful for multi-author blogs, forums, as well as community sites.
Let’s take a look at how you can easily block a WordPress user without actually deleting their user account.
Blocking a WordPress User Without Deleting Their Account
First thing you need to do is to install and activate the User Blocker plugin. For more details, see our step by step guide on how to install a WordPress plugin.
Upon activation, the plugin will add a new menu item labeled ‘User Blocker’ to your WordPress admin menu. Clicking on it will take you to the plugin’s settings page which is divided into three tabs.
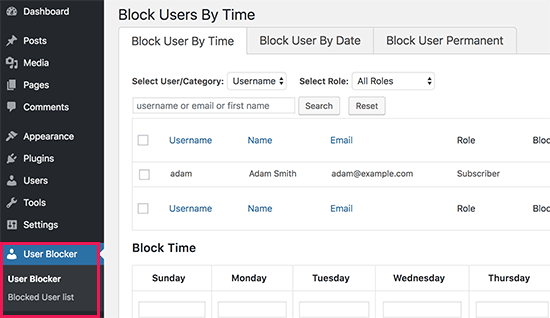
Block User By Time
Under Block User By Time tab, you’ll see the list of all registered users. You can select a user and add the time range when you want this user to be blocked.
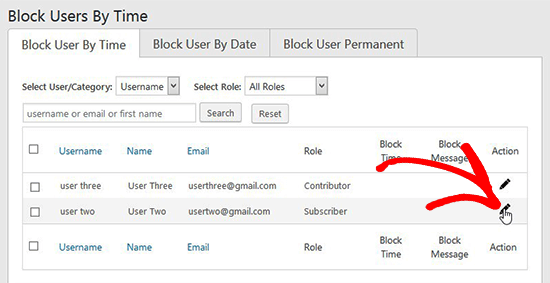
You can also block all users at once for a time range. Scroll down to block time option, add the time for each day separately, and click on the Apply to all button.

Once added, you need to click on the Block User button below to save your changes.
Block User by Date
If you want to block the users by date, then you can go to Block User By Date tab. You can select users from the list and add a date range to block them for these dates.
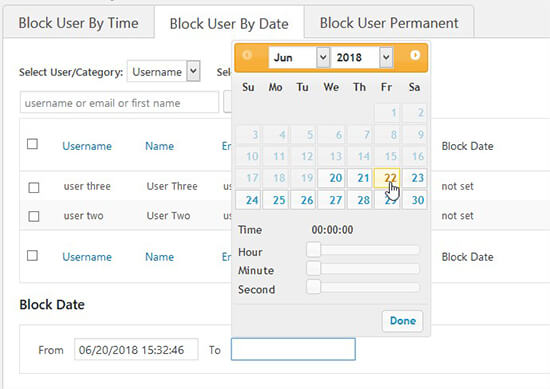
You can also select all users at once and block them for a similar date range.
Block User Permanently
To permanently block a user, you need to visit Block User Permanent tab. From here you need to select the user and click on Block User button below.
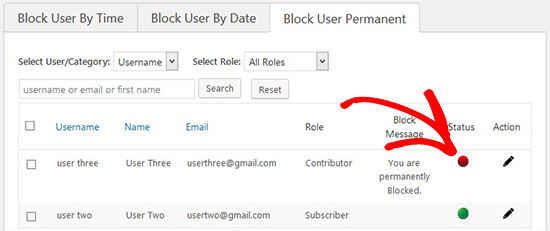
You’ll see their status changed to red.
Block User By Role
If your website has many user accounts, and you want to block users with a specific user role, then click on the Select User / Category drop-down and then select Role. This will now show a list of WordPress user roles. You need to select a role and click on the Block User button below to block all users with this user role.
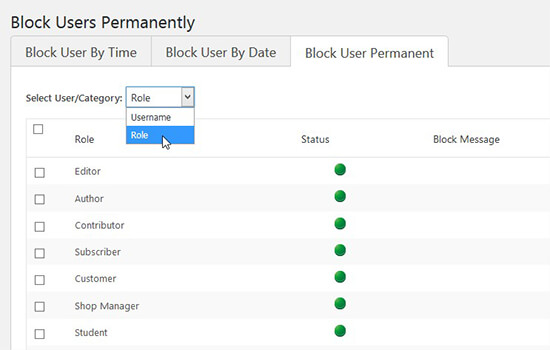
Note: You can’t block the users with administrator user role and permissions.
In all these actions, you can add a generic message for the blocked users. You can also add a custom message for each user. If you leave the field blank, then it will display the default message to blocked users when they try to login to their account on your blog.
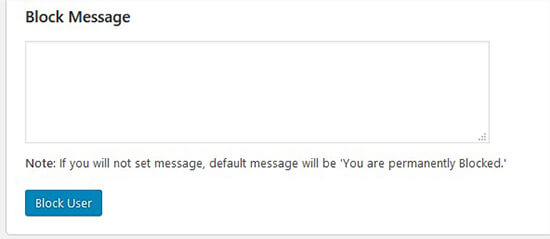
Once blocked, they will see an error message on the WordPress login page saying their account is temporarily or permanently blocked.
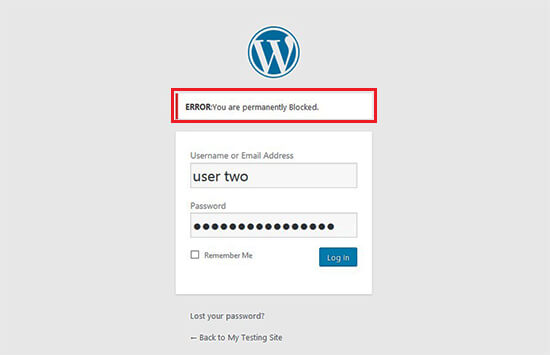
Note: You will need to keep the plugin installed and activated. Deactivating or deleting the plugin will automatically unblock all blocked users, and they will be able to login again.
How to Unblock a User Account?
To unblock a user, you need to visit User Blocker » Blocked User List page in your WordPress admin area. You’ll see the same 3 tabs as above with the list of blocked users categorized accordingly. There’s an additional Blocked User List tab that shows the list of blocked users from all 3 categories.
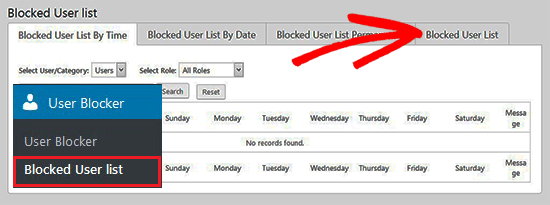
You can go to Blocked User List tab and click on Reset option below each user to unblock them.
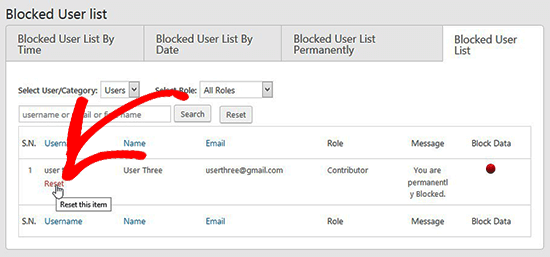
Once reset, the user can login to their account normally.


